
Figure 1: The Graphics Pipeline
This project was based around Vertex and Pixel shaders. It sets up a simple scene for object meshes to be rendered in, allowing the shaders to use the environment to calculate reflection and refraction colors. It uses Nvidia's cg toolkit library for the shaders, the open source image library DevIL for handling texture images, and the open source library GLUI to provide the GUI.
Shaders are very powerful tools that allow a programmer to take over certain parts of the graphics pipeline to shade objects with a specific model. This can be as simple as coloring the object with a solid color, or very complex where multiple effects are combined to create the shading for the object. The shaders are actually replacing parts of the pipeline (see Figure 1), so some other functionality of the normal pipeline must be implemented by the shader for it to work correctly. Vertex shaders replace the transform and lighting stages of the standard pipeline, so they must apply the modelViewProjection matrix to the position so the image is displayed correctly. Pixel shaders or fragment shaders replace the part of the pipeline that normally does the color summing. (The responsibilities of each of the shades is greater than what I have mentioned here. To see a more complete list, see the pdf file about the OpenGL shading language under my third resource link.)
Figure 1: The Graphics Pipeline
The first shaders were written in specific assembly languages that applied to a specific graphics card. Different companies, i.e. Nvidia and ATI, developed their own sets of extensions to OpenGL to allow programmers to use features of their cards. More recently, there has been a push to create a universal set of extensions that work on all graphics cards that support OpenGL and higher level shading languages. Currently, ARB (OpenGl's Architecture Review Board) extensions are some of the most portable to multiple platforms. Nvidia and ATI still have their own extensions (ATI, ATIX, and NV), but they will probably not work on other vendor's cards.
Nvidia has recently developed a toolkit for writing shaders called CG. It uses extensions which seem to be fairly portable (they work on my ATI Radeon 9800 Pro). CG also uses a "C" like language which has some special vector variable types and functions that are faster for processing. I choose to use CG because it made the shaders more abstract and portable. It also helped me avoid getting deep into extensions. One interesting thing about the way cg works is that the shaders are compiled and loaded at runtime, so errors in the shader code won't surface until you try to run the program.
Originally I thought I would create a variety of shaders, but the program took longer than I expected, so there were only 3 effects implemented in my shaders. There is an effect where the shader calculates reflection vectors and uses them to get a color out of the cube texture map. Another effect is very similar, but calculates refraction vectors. The third attempt is a standard lighting model, basically a variation on the Phong model. I created different variables that control how much of each effect is used in the shading of the object. I also allow the user to change all aspects of the scene including lighting, material (if none is defined for the mesh), mesh, and environment texture. The user can also perform various transformations on the mesh and camera with the mouse.
The vertex shader program is used to calculate the position, phong model color, the reflection vector, and the refraction vector. It passes the phong model color and the 2 vectors to the pixel shader. The pixel shader program is where the reflection and refraction vectors are used to look into the cube map texture to get the reflected and refracted colors. These 2 colors along with the phong color are then blended together based on some variables passed in by the main program. The advantage of splitting up the work between shaders is that the processing is not bottled up in one part of the pipeline. Also, the code can be faster than the normal model because it doesn't have to check and calculate everything the normal pipeline would. However, any feature that is normally done in the part of the pipeline the shader has replaced will not be able to be used by your program, so features such as fog will have to be calculated by the shader.
When my program is runs 3 windows appear. One is the standard console window, which I hardly used. The other 2 are the display window and the control window . All functionality for the program has been mapped to the mouse and the control window. There are only 3 keys on the keyboard which do anything.
ESC or q - exit the program.
h - help menu.
The right mouse button has a menu attached to it that has some basic viewing options, options for the functionality of the left mouse button, and some other utility functions. The middle mouse button is always set to zoom the camera.
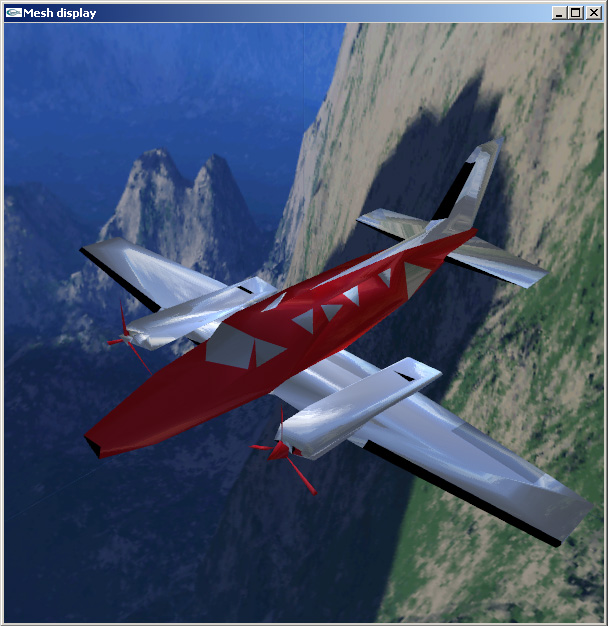
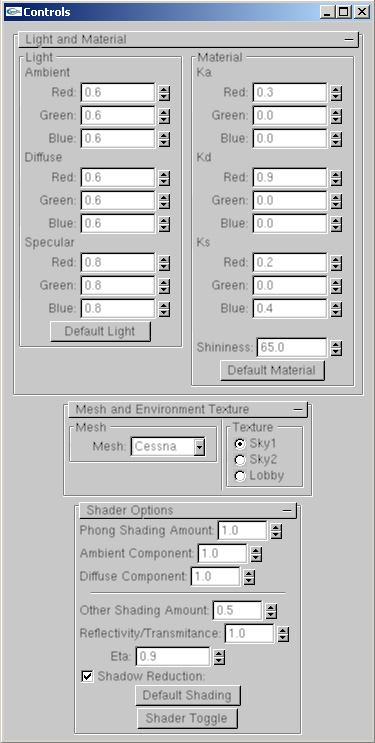
Figure 2: The Control Window and initial mesh and environment in the Display Window
The Control Panel has all the functionality for changing how the shader works. The light affects the normal OpenGL shading and the phong model of my shader. The material affects meshes that don't have materials specified (i.e. the bunny and the sphere). It too is used in the normal OpenGL shading and my phong model. The mesh and environment variables allow a user to chose which mesh to shade and what environment it will be placed in. Originally I was going to let the user load in any mesh with an editable text box, but I ran out of time to implement it in the end.
The shader options are the important part of the control panel. The Phong Shading Amount and Other Shading Amount control how much of the phong model and the reflection/refraction are added into the shading. These values are added to each other, so that increasing one does not reduce the amount of the other as linear interpolation would. However, this means that the color can get a little bit blown out if the highest values are used.
Ambient and Diffuse Components affect what percentage of the ambient and diffuse parts of the phong shading will be added into the phong shading. If both values are set to 0, then the phong model only adds specular highlights. The reflectivity/transmitance affects the linear interpolation between the reflection and refraction parts of the other shader. A value of 1 will make it all reflection while a value of 0 will make it all refraction. The Eta variable affects the index of refraction for the refraction model. The Shader Toggle button allows the user to switch between my shader and the normal OpenGL phong model.
Shadow reduction is my own experiment at an idea. It tries to make the reflection match with the "shadows" of the object by applying less reflection to areas that are less lit by the phong model. This way, darker parts of the model don't end up looking extremely reflective. Unfortunately, this mode has some weird effects at times, particularly if you are trying to see pure reflection, so it was implemented as an option and not fixed permanently.
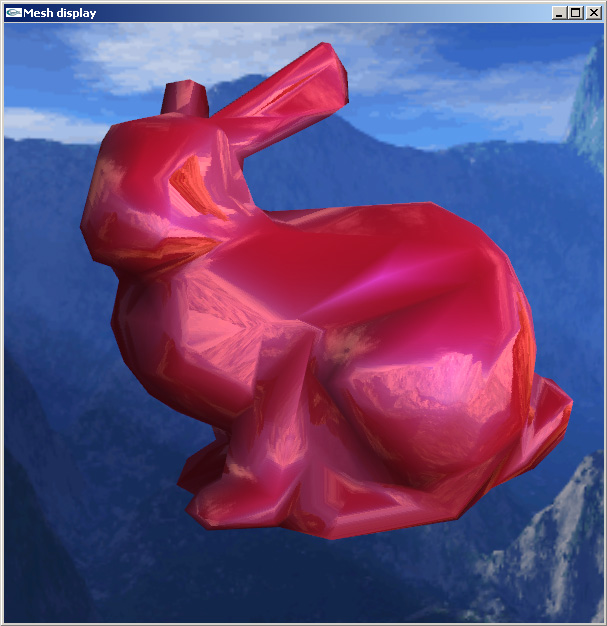
Figure 3: The bunny mesh in the sky2 environment using default material, full phong and reflection shading, and shadow
reduction.
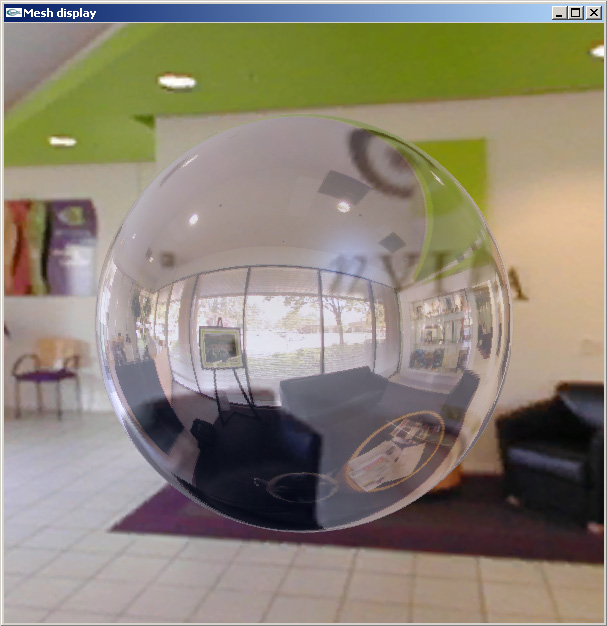
Figure 3: The sphere object in the lobby environment using a modified material, full phong and other shading, reflectivity/transmitance of .5, Eta of .98, and no shadow reduction.
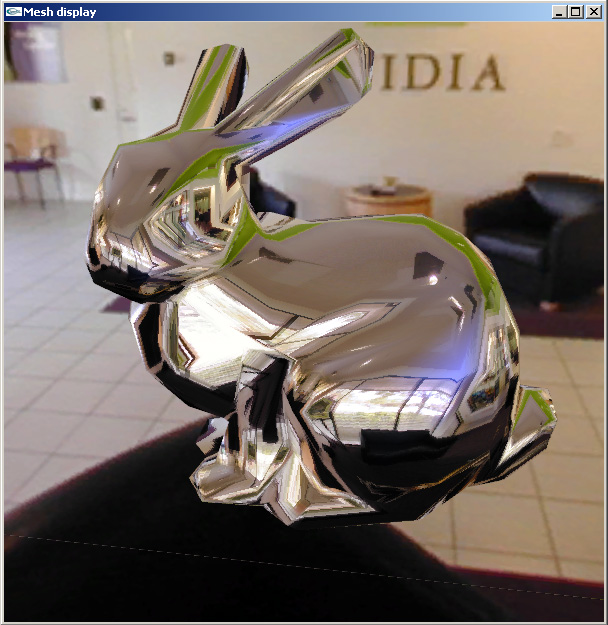
Figure 3: The bunny mesh in the lobby environment a modified material, full reflection shading, and blue specular highlights.
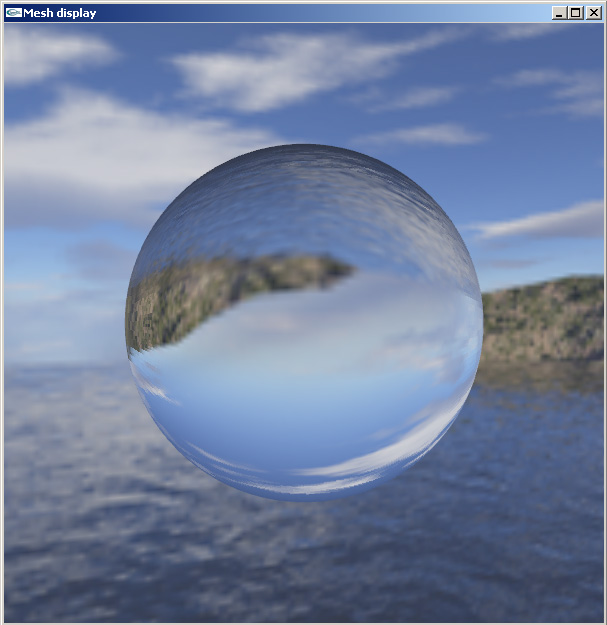
Figure 3: The sphere object in the sky2 environment using full refractive shading, Eta of .6, and no shadow reduction.
For some reason, my phong shading is always slightly lighter than OpenGL's phong model. It also is incorrect for the Cessna. I was unable to figure out where the glitch was before the code had to be turned in. I believe it has to do with transforms in the vertex shader.