up to 13 general purpose digital inputs/outputs (4 pins usable as SPI, 2 pins usable
as UART, and 2 pins usable as I2C)
4 1-amp DC motor outputs (can be bridged for 2 2-amp outputs)
8 RC servo outputs
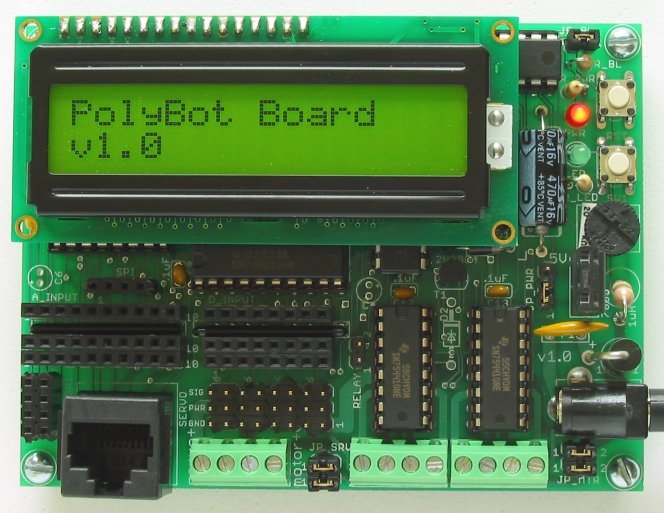
16 pin connector for an LCD with backlight
1 software-controlled LED
1 200mA relay/solenoid driver port
RJ-45 download connector (contains pins for SPI and UART)
download over USB
resettable fuse for over-current protection and reverse polarity
protection
jumpers for running the servos, motors, and logic at 3 different
voltages
jumper for enabling/disabling on-board 5V voltage regulator
jumper for enabling/disabling LCD backlight
The kit will come with the following parts:
printed circuit board, components, LCD display, download board circuit
board, USB download cable, and ethernet cable.
The board can be programmed in C using AVR-GCC (works on Windows, Linux, and Mac).
The software library for the board is available here. Make sure you use the correct version for your board revision:
For PolyBot board v1.1: v1.1 (You will need to edit the Makefile for your microcontroller and OS)
For Linux: Your distribution may already support avr-gcc. If not, follow these directions
What's the difference between the 1.0 and 1.1 revisions of
the board?
The 1.1 board runs at 20MHz and comes with an ATMega644 (newer boards come with an ATMega644P). The 1.1 revision has the I2C pins (SDA and SDL) routed out to the CON1 connector. Make sure
you use the appropriate software library for your board revision.
I erased the USB bootloader from my board, how can I get it back?
Please bring your board to my office and I will flash the bootloader back on to your ATMega32 chip. You can download the bootloader source code: here
How can I get more digital inputs/outputs?
If your application requires more digital outputs than are available on
the board, you can use the CD4094 (8-bit shift register with
latch). This chip has 3 inputs and provides 8 digital
outputs. These chips can be daisy chained to provide as many
digital outputs as needed.
If you need both digital inputs and outputs, you can add an I/O port expansion chip like the MAX7301 or PCF8574.
How can I get more program space, RAM, EEPROM, or another UART?
The ATMega644 is a drop-in replacement for the ATMega32. It provides 64KB flash, 4KB RAM, and 2KB EEPROM. It also runs at 20 MHz. The ATMega644P has the same features as the ATMega644 and has 2 UARTs.
Why are C4, C6, and D2 left vacant on the board?
Extra capacitors can be placed in C4 and C6 if you find that they are
necessary for your application. A Zener diode can be placed in D2
to provide minor protection against accidentally sending high voltage to the logic.
Assembly Instructions, Hints, and Tips
Complete assembly instructions are in the user's guide.
Soldering tips
If you have never soldered parts to a printed circuit board
before, it really helps to get some practice. You can practice by
adding solder to components on an old circuit board or by soldering
components to a proto board.
The key to getting a good solder joint is to heat up both the
solder pad on the board and the lead of the component you are soldering.
Main board assembly
Take your time and be careful! Desoldering a socket or multi-pin connector is quite difficult, so make sure you do things right the first time. I like to solder 1 or 2 pins of a socket first and then flip the board over to verify the part is correctly installed. Then I solder the rest of the pins.