It is assumed the user is a music enthusiast familiar with tape recording
audio cassettes from Compact Discs. The user must know how to manipulate
a common WIMP interface (windows, icons, menus, pointers). It is
assumed the user knows how to save playlists using the WinAmp© software.
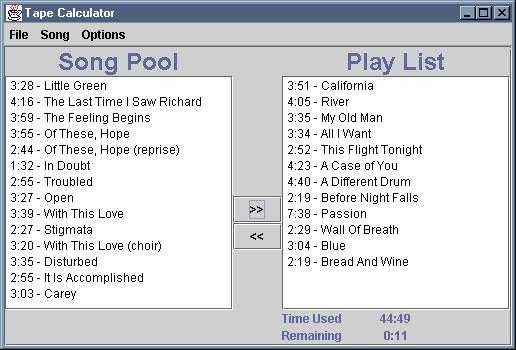
Figure 1: Tape Calculator Main Window
3.2 The primary function afforded by the interface is moving songs from the Song Pool to the Play List. This is accomplished by selecting a song with the mouse and then clicking the move button (">>"). See this storyboard for a step-by-step illustration.
3.3 Menu Bar
The menu bar has available the following options:
File
    Open
    Import
    Save
    Exit
Song
    Add
Options
    TapeLength
    Clear
    Reorder
3.4 File -> Open
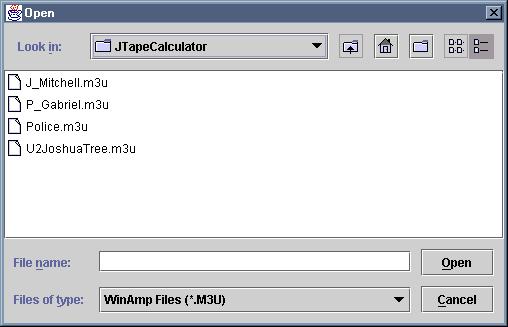
Selecting File -> Open will open a standard File Chooser Dialog
as shown in Figure 2. The default file type will be ".m3u" for
WinAmp files. The contents of the selected file will appear in the
Song Pool. If songs already exist in the Song Pool, the new songs
will be appended to the bottom of the list.
Figure 2: Open File Chooser Dialog
3.5 File -> Import
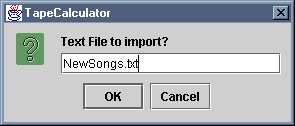
Selecting File -> Import will open a text input box to enter
the name of the desired file as shown in Figure 3. The contents of the
selected file will appear in the Song Pool. If songs already exist
in the Song Pool, the new songs will be appended to the bottom of the list.
The format of imported files is shown in section 6.2.
Figure 3: File Import Dialog
3.6 File -> Save
Selecting File -> Save will open a standard File Chooser
Dialog similar to Figure 2. The user may select or enter the name
of the file where the current Play List will be saved. The contents
of the Play List will be stored as a text file in the format shown in Section
6.3.
3.7 File -> Exit
The Exit option terminates the application.
3.8 Song -> Add
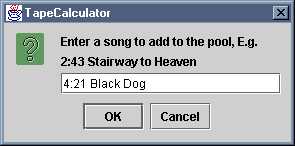
Selecting the Add Song option presents a text entry dialog for the
user to enter the time and title of an individual song. The song will be
added to the bottom of the Song Pool.
Figure 4: Add Song Dialog
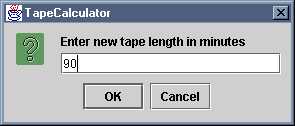
3.9 Options -> Tape Length
The user can enter a new value for the length of the audio tape (in
minutes) using the Tape Length option.
Figure 5: Set Tape Length Dialog
3.10 Options -> Clear
Selecting Clear will delete all the songs in the song pool (without
confirmation).
3.11 Options -> Reorder
Selecting the Reorder option will present the Reorder Dialog shown
in Figure 6. All the songs in the current Play List will populate
the reorder list. The user may place individual songs into a different
ordering using the "move up" and "move down" buttons as shown in the sequence
below.
Figure 6: Reorder Dialog
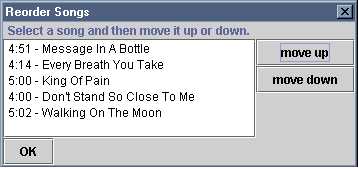
Step 1: The Reorder dialog appears with the songs in the current Play
List.
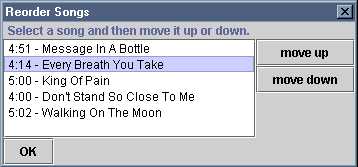
Step 2: The user selects the song they desire to move to a new location.
The selected song is highlighted.
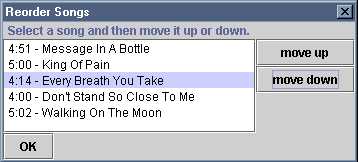
Step 3: The user has clicked "move down" and the selected song now
appears one spot lower in the list. The user may press "move down" as many
consecutive times as desired without having to re-select the song. If the
song is at the bottom of the list pressing "move down" has no affect.
The dialog works in a similar fashion for "move up." Clicking the
OK button closes the dialog and the reordered list is displayed in the
Play List.
#EXTM3U
#EXTINF:336,U2 - Where The Streets Have No Name
F:\Track01.cda
#EXTINF:278,U2 - I still Have not Found What I'm Looking for
F:\Track02.cda
#EXTINF:296,U2 - With or With out you
F:\Track03.cda
#EXTINF:272,U2 - Bullet the Blue Sky
F:\Track04.cda
#EXTINF:258,U2 - Running to stand still
F:\Track05.cda
#EXTINF:293,U2 - Red Hill Mining Town
F:\Track06.cda
#EXTINF:177,U2 - In God's Country
 6:47 feel so different
 4:47 three babies
 5:16 the emperor's new clothes
 3:35 black boys on mopeds
 5:10 nothing Compares 2U
 4:12 Jump in the river
PlayList created by Tape Calculator
 3:34 - All I Want
 3:35 - My Old Man
 3:28 - Little Green
10:37